The short answer
Garden decking is built in a clear sequence: prepare the ground, build a level sub-frame, then lay the boards on top. First the area is cleared, levelled and often covered with weed-control membrane over compacted ground or gravel. A sub-frame (frame and joists) is then built, sitting on concrete footings, paving slabs or posts so it is firm and level, with joists spaced at regular centres (commonly around 400mm, or closer for some composite boards). Deck boards are fixed across the joists with a small gap between them for drainage and expansion, using screws or hidden clips. Finally the edges are trimmed, fascia boards added, and timber decks treated. Good ground prep and a level, well-supported frame matter most.
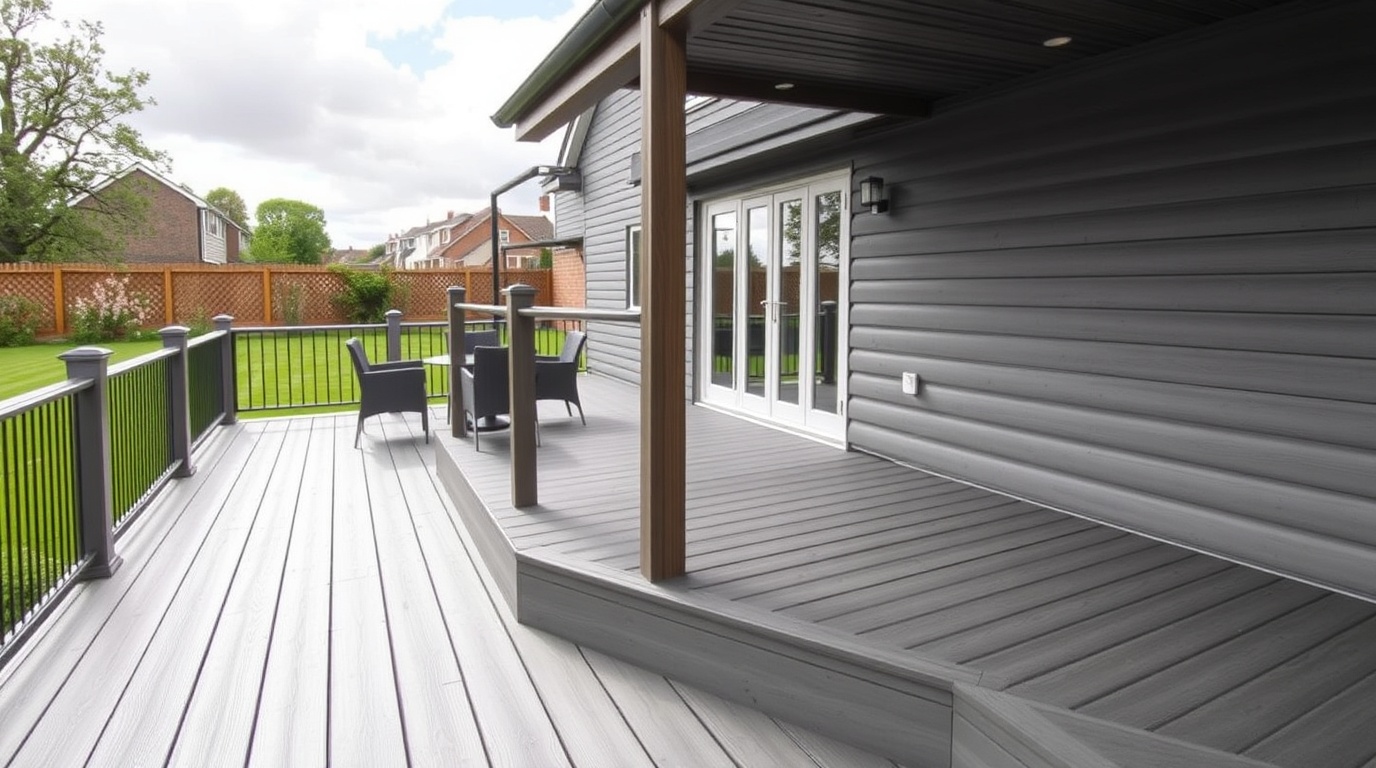
Decking looks simple, but a deck that lasts depends on the work hidden underneath. This is the established order of building a garden deck, from ground prep to the finishing boards.
Build sequence
- Step 1Clear and level the ground
- Step 2Lay membrane / base
- Step 3Build the sub-frame and joists
- Step 4Support on footings or posts
- Step 5Fix the deck boards
- Step 6Trim, fascia and finish
Step 1 and 2: prepare and level the ground
Every sound deck starts with ground preparation. The area is cleared of turf, plants and debris, and the ground is levelled as far as practical. A layer of weed-control membrane is usually laid to stop growth coming up through the deck, often topped with a layer of gravel or set over a compacted, free-draining base. Good drainage beneath the deck matters because trapped damp is what shortens a deck's life.
The position is also set out at this stage. The deck is marked out with pegs and string, and the heights worked out — particularly important if the deck meets a doorway, where the finished surface usually needs to sit below the damp-proof course of the house. On a sloping site this is where the extra support height is planned in.
Step 3 and 4: build and support the sub-frame
The sub-frame is the structural heart of a deck — the frame and joists the boards sit on. An outer frame is built to the deck's shape, then joists are fixed across it at regular spacing. A common joist spacing is around 400mm centres for timber decking, but many composite boards need closer spacing (often around 300mm, and closer again at the ends or for diagonal patterns), so the board manufacturer's instructions decide the figure.
The frame must sit firm and level. It is supported on a base of concrete footings, paving slabs, or timber/concrete posts set into the ground, depending on the design and how raised the deck is. A low ground-level deck may rest on a grid of slabs; a raised deck needs posts set into concrete footings. The frame is checked for level in both directions, because any twist or sag here shows up in the finished surface.
Step 5: lay and fix the deck boards
With a level frame in place, the deck boards are laid across the joists, running at right angles to them. Two details matter here:
- Spacing: a small, even gap is left between boards — typically a few millimetres — to allow rainwater to drain and to give timber room to move with the seasons. Composite boards have their own recommended gap to allow for thermal expansion, set by the manufacturer.
- Fixing: boards are fixed with decking screws driven into each joist, or with hidden clips that sit in a groove on the board edge for a fastener-free surface (common with composite). Screws should be corrosion-resistant and long enough to bite firmly into the joist.
Boards are kept straight and the gaps consistent as work proceeds, with spacers used to hold an even gap. Joints between board ends are arranged to land on a joist so both ends are supported.
Step 6: trim, edge and finish
Once all boards are down, the overhanging ends are trimmed to a clean line, and fascia or skirt boards are added around the edge to hide the frame and give a finished appearance. Steps, balustrades or handrails are fitted where the deck is raised — and on a raised deck a balustrade is an important safety feature, not just a finishing touch.
The final step depends on the material. Timber decking is treated with a decking oil, stain or preservative to protect it from water, UV and rot — and this needs repeating over the deck's life. Composite decking needs no oiling or staining; it is simply cleaned. Pressure-treated softwood is the most common UK decking timber, but it still benefits from a protective finish. Throughout the build, the priorities that decide longevity are the same: firm, level support; correct joist spacing for the board; even drainage gaps; and corrosion-resistant fixings.
Drainage, ventilation and rules to build to
Two design details, easy to overlook, decide how long a deck lasts. The first is drainage: the ground beneath the deck should be free-draining, and the gaps between boards must be kept open so rainwater runs away rather than pooling on the surface or sitting against the timber. The second is ventilation: leaving air to circulate beneath the deck lets the structure dry out between rains, which is what keeps a timber frame from rotting. Skirting around a raised deck should still allow some airflow rather than sealing the underside completely.
Doorway heights matter where a deck meets the house. The finished deck surface usually needs to sit below the damp-proof course of the building, so water cannot bridge across to the wall. This is set out and checked during the levelling stage, before the frame is built.
Finally, build to the rules. To stay within permitted development and avoid a planning application, a deck should be no more than 30cm above the natural ground level and, with other garden structures, cover no more than 50% of the garden. Raised decks, listed buildings and conservation areas have stricter requirements, and a raised deck where a fall could injure someone brings safety and possibly Building Regulations into play. Confirming the planning position before building, and following the board manufacturer's fixing and spacing instructions throughout, are what turn a tidy-looking deck into a safe, long-lasting one.
Materials, tools and getting the order right
It helps to know what the build actually involves before starting, both in materials and in the equipment needed. The core materials are pressure-treated timber for the frame and joists, deck boards in timber or composite, a base of concrete, slabs or posts, weed-control membrane, and corrosion-resistant fixings — decking screws or hidden clips. Fascia boards, joist hangers and post supports complete the list, and timber decks also need a finishing oil or stain.
The tools are mostly standard: a spirit level (a long one is invaluable for checking the frame), a tape measure and pencil, a saw for cutting boards and joists, a cordless drill or impact driver, a spade for the footings, and spacers to keep the board gaps even. A string line and pegs set out the area accurately at the start.
The order of work is what ties it together, and it is worth respecting: prepare and level the ground, build and support a level frame, then lay and fix the boards, and only then trim, edge and finish. Each stage relies on the one before — boards laid on an out-of-level frame will never sit true, and a frame built on poorly prepared ground will move. Working methodically through the sequence, checking level repeatedly, and following the board manufacturer's spacing and fixing instructions throughout, is what turns a pile of timber into a deck that stays sound for its full lifespan.
Frequently asked questions
What goes under decking?
Most decks sit over cleared, levelled ground covered with weed-control membrane, often over gravel or a compacted free-draining base. The deck frame is then supported on concrete footings, paving slabs or posts. Good drainage beneath the deck helps it last by keeping the timber from sitting in damp.
How far apart should decking joists be?
Timber decking joists are commonly spaced around 400mm apart (on centre), but many composite boards require closer spacing, often around 300mm and closer at board ends or for diagonal layouts. Always follow the board manufacturer's instructions, as the right spacing depends on the specific decking product.
Why are there gaps between deck boards?
A small, even gap between deck boards lets rainwater drain away and gives the boards room to expand and contract with temperature and moisture. Timber needs a few millimetres; composite boards have a manufacturer-specified gap to allow for thermal movement. Closing the gaps up risks water pooling and boards buckling.
Sources & further reading
- Checkatrade — how to build decking / cost guide
- RHS — patios and decking advice
- Planning Portal (gov.uk) — decking
Figures on this page are typical UK ranges drawn from published sources and depend on your specific garden. They are guidance, not a quotation.